| 22. Now we'll work on the rim of the bell.
Add a new layer, and load the rim selection that you downloaded.
Flood fill with white, and move into place at the bottom of the bell.
Do not deselect.
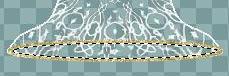
23. Go to 'effects/plugin filters/bladepro',
and use a gold preset or whatever you choose. I used 'gold glitter'
on mine. You could use a different preset, or a metallic effect
in PSP if you prefer. Deselect.
24. Now place your 'magic wand'  inside the oval, and click in between the two lines to select the inside
part of the rim. Go to 'selections/modify/expand', and expand by
1.
inside the oval, and click in between the two lines to select the inside
part of the rim. Go to 'selections/modify/expand', and expand by
1.
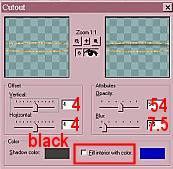
25. Add a new layer. Go to 'effects/3d effects/cutout', and set
as in the image below.
26. Now we'll add some depth. Go to 'layers/merge/merge
visible' to merge the bell and rim layers.
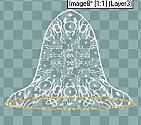
27. With your 'magic wand', click in the open
area outside your bell, then go to 'selections/invert' and your bell is
now selected, with the 'marching ants' (I've often wondered who coined
that phrase!) around it.
28. Add a new layer.
29. Go to 'effects/3D effects/cutout', and choose
the following settings:
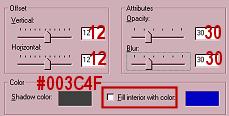
30. Click OK. Do not deselect. Add
a new layer, and make another cutout with the following settings:
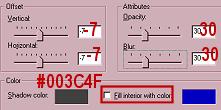
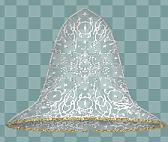
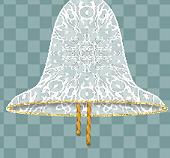
The shading is subtle, but enough to give a little
depth to the bell shape without obscuring the lacy look of it. Your
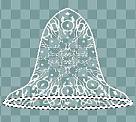
bell should now look similar to the image below. Deselect.
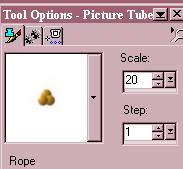
31. Now we'll add the clappers. Add a new
layer and click on your tube tool  . Choose the rope tube, and set as below.
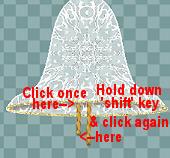
32. Place your cursor on the bell inside
the top of the rim, and draw two straight lines as shown below.
Note: Click once when you place your cursor
where you want to begin, then check your coordinates. Hold down your
shift key, and place your cursor at the point where you want to end your
line. Make sure you're at the same horizontal coordinate as when
you first clicked, and click again. You'll have a perfectly straight
line made with the tube you're using.
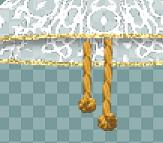
33. Again using your rope tube, place your cursor
at the end of the straight line you drew, and using a small circular motion,
draw a filled in circle. I hope the image below will help explain
this, because I didn't do very well with words! LOL Draw
a second, longer line and ball beside the first.
34. OK, now comes the fun part! To change
the color of your clappers to white, you can do one of two things.
You can make a rectangular selection around them, click inside to
select them, and then flood fill with white. This is the easier way.
However, you lose detail when you do it this way, and they look awfully
flat, so here's how I do it to retain the look of the rope.
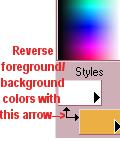
35. Using your eye dropper tool  ,
with tolerance set fairly high, click on the lightest color in the rope.
Click on the little square arrow under your color selector, and the color
you just chose will become your background color. Now set your
foreground color to white. ,
with tolerance set fairly high, click on the lightest color in the rope.
Click on the little square arrow under your color selector, and the color
you just chose will become your background color. Now set your
foreground color to white.
36. Click on your color replacer tool  ,
then double click on the layer that contains the clappers you just drew.
All instances of the light gold color you chose with the eyedropper will
change to white. Since there are several different shades of the
lighter color, you may have to do this several times to cover all the lighter
areas. Just make sure that the color you want to replace is your
background color, and white is your foreground color. ,
then double click on the layer that contains the clappers you just drew.
All instances of the light gold color you chose with the eyedropper will
change to white. Since there are several different shades of the
lighter color, you may have to do this several times to cover all the lighter
areas. Just make sure that the color you want to replace is your
background color, and white is your foreground color.
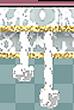
37. When the lighter parts are done to your satisfaction,
do the same with the darker areas. Use a light grey as your foreground
color for these, and you should end up with something like the image below.
38. Layers/merge/merge visible, and your bell
is finished. If you export the file as a tube, you can use the finished
bell for other projects in the future.
If you'd like to see how I made my ribbon, please continue
with
Page
4

|