|
Making the Ribbon
All you need to make this ribbon is PSP. I made
mine in version 7, but version 6 will likely work. I don't make any
promises, though...don't remember much about what was in that! LOL
You'll also need Blade Pro if you want to do the edges
like these, or you could just use a metallic effect in PSP.
1. Open a new transparent image, about
300x300, 16 million colors. I know that sounds big, but I think you
get a nicer end result if you size down rather than sizing up.
2. Click on your draw tool  ,
and set it up as in the image below. ,
and set it up as in the image below.
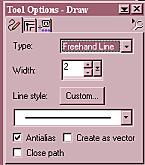
3. Make sure your color swatches are set
up as follows: foreground white, background null. Click on
the little arrow in the swatch box and choose the circle with a line through
it to change the background to null.
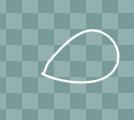
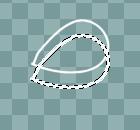
4. Go back to your image, and draw an oval
shape. The shape doesn't have to be a perfect oval...in fact, it
shouldn't be! Something like in the image below will be fine.
5. Now go to 'edit/copy', to copy the oval
you just drew. Then 'edit/paste/as new selection' to load the copy
into your image. The copy will have the 'marching ants' around
it. Do NOT deselect.
6. Go to 'image/rotate', rotate the copied
shape 15 degrees right,
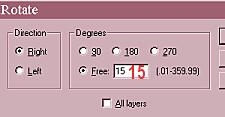
and move so that the points of the two loops are together,
as shown in the image below.
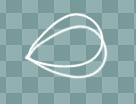
7. Now go to 'layers/merge/merge visible',
to merge the two layers into one.
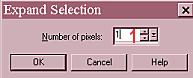
8. Using your 'magic wand', and holding
down your 'shift' key so that you can select multiple areas, click inside
the two open spaces in your loop, then go to 'selections/modify/expand',
and expand the selection by 1.

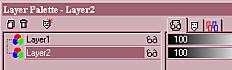
9. Do not deselect. Add a new layer,
and flood fill the selections with a color of your choice, then open your
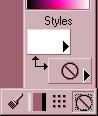
layer palette  , and
drag this layer under the first one, as shown. , and
drag this layer under the first one, as shown.
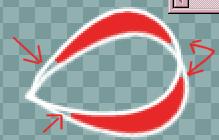
This is what you should have now. You'll notice
that the flood fill did not reach into the narrower parts of your selections,
so we'll have to fix that.
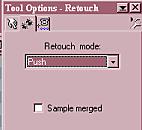
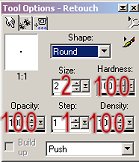
10. Click on your retouch tool  ,
and set it up as below. ,
and set it up as below.
11. Go back to your image, layer 2 (the one with
the colored fill), and place your cursor in the red area. 'Push'
the color into the blank areas by holding down your mouse button while
moving into those areas. If some spills outside the lines, just use
the same tool to erase it by moving from an area with no color into the
color you want to remove.
NEXT
PAGE

|