| You'll need PSP 6 or 7 if you prefer to do your own
drawing with vectors. PSP 5 will likely work if you choose to use
the zipped petal graphics. You can download them here.
You'll also need WinZip to unzip the petals. You can download a copy here.
Step 1
If you're using the zipped petals, shift D to copy
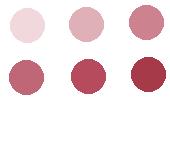
, and close the original. Flood fill each petal with (or colorize
to) a very pale shade of a color you like. Here's the color palette
I used. You're welcome to use it if you'd like. I also used
white, but it doesn't show up on here...didn't think of that! LOL
I found it easier to do some of the shading if I had
the entire rose showing. It enabled me to see how far to take the
shading when there was another petal on top of the one on which I was working.
Step 2
Once you've flood filled
or colorized each of the separate petals, we'll start with Petal 1.
Click inside the petal with your magic wand, then
go to selections-->modify-->expand by 1. Keep selected, and add a
new layer. Do not deselect.
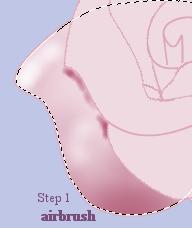
Use your airbrush (the little spray can on your toolbar)
with the settings below,

and spray some color into your petal. Start at
the bottom, where the petal joins the rest of the flower, making it darker
and getting lighter as you advance toward the outer edge, as below.
Do not
deselect.
Step 3
Now go to 'image-->blur-->gaussian blur, and set it
to about 5. This softens your shading. If you find that it
doesn't look as soft as you'd like, hit undo, and try a higher setting
on your gaussian blur until you find the look that suits you. Keep
in mind, though, that at some point, the shading color may just dissipate
if you use too high a setting on the blur.
Step 4
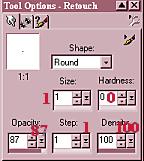
Now that you have the shading done, go to your retouch
tool (the little hand with a pointing finger), and use the smudge brush
set as follows:
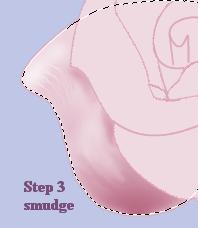
Smudge small wisps of darker color into the light parts
of your petal. When you want larger areas pulled into it, raise the
size of your smudge tool to 5 or 6. You should have something like
the image below when you're done, although you may prefer more than I have
here. Remember, though, that flower petals are not flat...they tend
to follow round lines, so keep your motion with the smudge tool curved
to follow the outline of what you're coloring at the time. In this
case, I want the petal to curve out away from the flower, so I'm smudging
in a rounded motion to the left, then curving in toward the inside as I
reach the part of the petal that curves inward.
Make all layers invisible except the line drawing layer
and the coloring layer for this petal, then go to layers...merge...merge
visible.
NEXT
PAGE
All images and content copyright 2001 Rainbow Row Graphics
|