| This tutorial is my original work. It is not available for
download, other than for personal use. Please do not take my work
and claim it as your own by uploading it to another site. If you wish to
use it for email groups or tutorial groups, please ask me first, and then
offer a link to it here, where it belongs. Thank you.
The Blade Pro presets I use in this image are based on Dee's Silver Shimmer preset, which Dee kindly allowed me to use here. If you haven't visited Dee's site, you're missing some wonderful tutorials and presets. Click the link above and prepare for a treat!
This image was made in PSP 7, but I see no reason why it can't be
done in PSP 6.
Supplies needed: Paint Shop Pro...download a fully functioning demo here.
I have a bad habit of not doing this, but I must remind you to
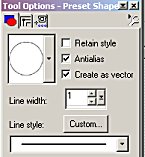
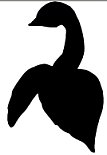
Okay, if you're ready, we'll get started. 1. Open a new image, 534 x 734. I know that's a large image, but I like to work on a large canvas and downsize when I'm finished. Also, if you're using the selections I provided, they won't work on an image that's not the same size as I had. If you prefer smaller, feel free to work in a manner which is more comfortable for you. These are only guidelines...nothing is written in stone. If you find an easier way to accomplish certain steps, please let me know! 2. Using your preset shapes tool, set as follows:
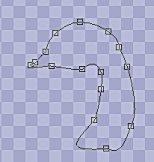
foreground and background colors black, draw a small oval near the center top of your image. For those of you using selections, just load the peacockbody.sel for this, flood fill with black and skip down to step 9. 3. Click on your object selector 4. This is the shape you want to pull your oval into by node
editing. I just keep adding nodes as I need them to get the shape
I want. When you're finished shaping it, go to your layers palette,
and right click on the layer you're working on, then click on 'convert
to raster layer'. Name this layer 'head'. Original, huh?
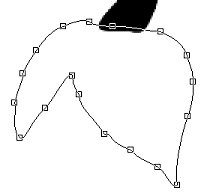
5. Add a new layer. Draw another, larger oval using the preset shapes tool set as before. Your image should look similar to the one below.
6. Adjust your nodes until your oval looks like the image below.
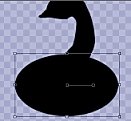
7. Convert this layer to raster, and this is what you should have now.
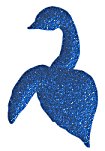
8. Go to 'layers/ merge/ merge visible', and name this layer 'body' or something similar. 9. With your selection tool, draw a rectangle around the image, then click inside the rectangle to select the image. 10. Go to 'effects/plugins/blade pro', and apply the peacockblue preset provided in the zip file. Your image should look similar to the one below. If you'd like the color brighter, just adjust the 'brightness/contrast'. It seems to bring out a kind of glittery look in this preset.
Now, if I were you, I'd take a break. Grab a cup of coffee
or a coke,
|