| These will be the finishing steps of making this image. They're
not difficult, but they can become very boring. Just thought I should
warn you ahead of time! LOL
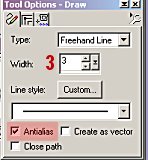
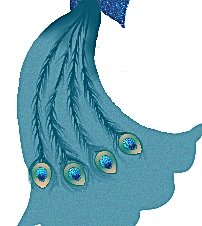
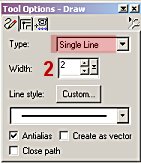
33. In your layer palette, hide all layers but the main tail layer and the first row of 'eyes' you made...the ones at the bottom end of the tail. Add a new raster layer. 34. Set your foreground color to the darker of the two greenish blues you've been using, and your background to null. Using your draw tool set as follows:
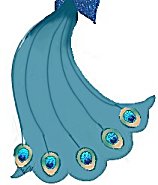
draw curving, freehand lines from the top of the tail down to the top of each of the 'eyes', as shown here.
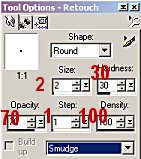
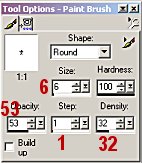
35. Now using your smudge brush, set as follows, smudge these lines so that they look similar to the image below.
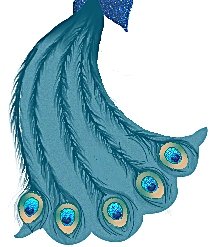
Put your brush on the line, and draw it out a little, then using a rounded motion, draw it down. When you get to the 'eye', draw it around the eye as shown. This has to be done on both sides of the line. 36. When you've reached an effect that pleases you, go to your layers palette and hide the tail and body layers. Merge/visible the feathers and the 'eyes' layers. 37. Now you can hide the merged layer, and open the layer containing the second row of 'eyes'. 38. Add a new raster layer, and repeat the steps above to complete the feathers for this row. Again, when you have a look that pleases you, merge the 'eyes' and the feather layers.
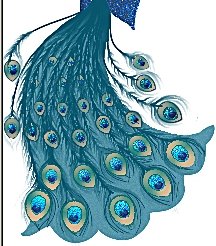
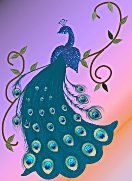
39. Do this for each row of 'eyes' you put on the tail, as well as for the ones that are outside the main part of the tail. I didn't bother doing these for the smaller eyes that are further toward the top of the tail, since they wouldn't show up very well anyway, and would just make things look crowded and messy. When you're finished, your image should look similar to the one below. If you've been working with the opacity of your tail layer lowered, as I was, now's the time to bring it back up to 100%. Ah, that looks better, huh?
Bet you're glad that the tail's finally done, huh? Told you it was boring! LOL 40. Now make all your layers visible and add a new raster layer. At the top of the bird's head, use your draw tool set as follows
and draw 5 small lines as shown below.
41. Using your paintbrush tool, set as below, draw a dot at the outer end of each line, as shown.
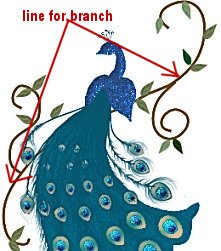
42. Add a new raster layer. Again, using your draw tool, with the settings below, draw a freehand line for the tree branch the peacock is sitting on, as shown below. Embellish with leaves, flowers, or whatever you like. If you're using selections, there's one included for this branch...just fill with a color you like, and place the leaves.
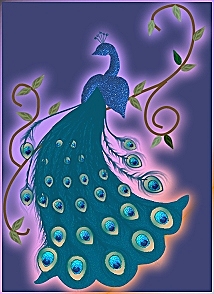
43. Go to your layers palette, and merge visible layers. You're all done, although you'll likely want to resize this image smaller. 44. If you'd like to do the background the way I did mine, here's what I did. Add a new raster layer beneath the merged layer you now have, and go to 'effects/plugins/Greg's Factory Output/gradient blocks', and play with the settings until you get colors you like. You could use a favorite gradient if you prefer, but I like playing with the color effects in this filter. Any of Harry's color grads would work, too. If you don't have Greg's filters, you can download them here.
45. Add a new raster layer, and flood fill with a solid color you like that will complement the colors in the peacock. 46. Make your peacock layer active, and using your selection tool, draw a rectangle around the peacock. Click inside the rectangle to select the peacock. 47. Now go back to your layer palette and make the solid color layer the active layer. 48. Go to 'selections/modify/feather', and set it at about 25, then hit your delete key. If not enough of the rainbow colored background shows through, hit delete again until it looks the way you want it to. Now you can deselect. 49. Still with the solid color layer active, if you want the rainbow type border, go to 'selections/select all', then to 'selections/modify/contract' and contract by whatever width you want your border to be (I used 5). Now go to 'selections/invert', and then hit delete.
I do hope you enjoyed this tutorial,
Explanation is not one of my strong points, so if
All images and content ©2002 Rainbow Row Graphics
|