| Welcome back! Hope you had lots of chocolate to keep you going
for the next little while!
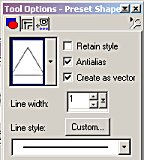
We're going to work on that fancy tail now, and it can be rather boring. I do think that the end result is well worth it, though, so let's get started. 11. Add a new raster layer, and name it 'tail base' or something that will make it easier to know which layer you're working on. If you're using selections, load the 'peacocktail.sel', and skip down to step 15. 12. With your background and foreground colors set to a darker blue green...I used #026D82, and your preset shapes tool set as follows:
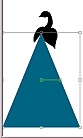
draw a long, wide based triangle starting just at the point where the body part of your image goes up into a v-shape, as in the image below.
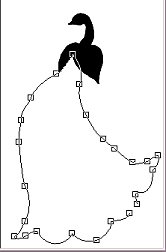
13. Now go to node edit, and manipulate your nodes until you have a shape similar to the one below. It doesn't have to be perfectly smooth, because the feathers will pretty much cover the edges of it, or you can smooth it out with your freestyle line tool later.
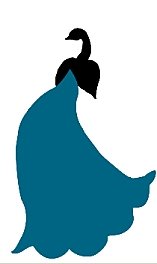
14. Go to layers/convert to raster, and this is what you should have.
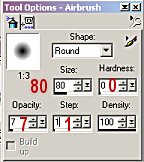
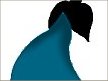
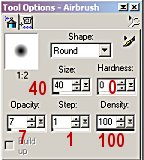
15. With your selection tool, draw a rectangular selection around the entire tail shape, and then click inside it to select the tail shape. 16. Add a new raster layer. 17. Using your airbrush tool, set as below, shade the top part of the tail with a darker shade of the tail color ( I used #023F4A) as shown.
18. Effects/blur/gaussian blur set between 6-8 to soften the shading you've done. 19. Deselect. Go to your layers palette and hide all
layers except the tail and the tail shading. Then go to 'layers/merge/merge
visible'. In your layers palette, pull the merged layer down below
the body layer.
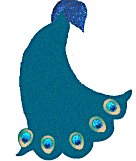
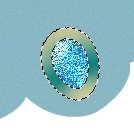
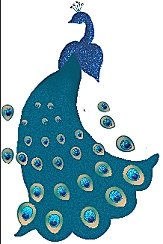
NOTE: The following steps detail how to make the 'eye' shape which is typical of a peacock tail. When you've finished making your 'eye', you'll be placing them into rows on the tail, as in the image below. Each time you finish a row, ADD A NEW RASTER LAYER for the next row. It makes it easier to work on the feathers afterwards.
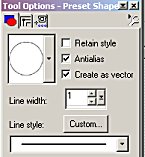
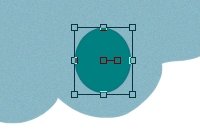
20. Add a new raster layer. If you're using selections, you can skip down to step 23. Using your preset shapes tool, settings as below, draw an oval shape close to the middle curve in the bottom of the tail. I used the same color as the tail for the stroke, and slightly lighter for the fill.
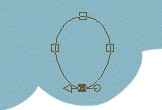
I lowered the opacity on the tail layer so that it would be easier to see what I was doing, since I was working with colors that were just slightly lighter than the tail itself. 21. Adjust your nodes until your shape is similar to the one below, then go to 'layers/convert to raster layer'.
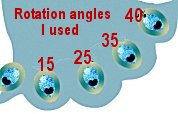
22. Now go to 'image/rotate', and rotate your 'eye' shape to the left about 25 degrees, or until it looks as if it's going in the same direction as the tail.
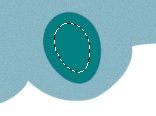
NOTE: Whenever you rotate an image, remember to go to 'effects/sharpen' and sharpen your image once, since rotating distorts the image somewhat. 23. With your selection tool, draw a rectangle around your eye shape, and click inside it to select the shape. Go to Selections/contract and contract by about 15, so that your image looks similar to the one below. For those using selections, load 'row1eyes.sel', flood fill with the deep bluegreen color, and complete the following steps for each 'eye' shape in the row. Then load each of the other 'eyes.sel' on a new layer and repeat for that row. Frankly, for this part I think it would be quicker to make your own shape for each row, because you can complete one 'eye' for each row and just copy, paste, and rotate each one to make the row.
24. With your foreground color set to white, flood fill the selection. Do not deselect.
25. Now go to 'effects/plugins/blade pro', and apply the 'peacocklight' preset you downloaded in the zip file, or another preset of your choice.
26. Using your 'magic wand' tool, click in the plain green part of the shape to select it, then add a new raster layer. Go to 'selections/modify/feather', and feather by 1. Do not deselect. 27. Using your airbrush set as follows, brush from outside your selection into the selection, as shown. I used color #DFBA85.
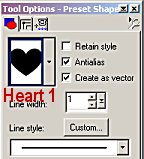
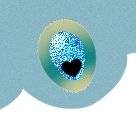
28. Add a new raster layer. 29. Using your preset shapes tool, settings as below, foreground and background colors set to black, draw a small heart shape in the pointed end of your 'eye' shape.
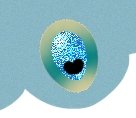
30. Using your eraser tool, round off the pointy end of the heart, as shown below, and rotate the heart shape by the same amount as you rotated your 'eye' shape, so that it's angled in the same direction as the 'eye'.
31. Now you can go to your layers palette, turn off your tail
and body layers, and merge/visible the eye and heart layers. Those
of you using selections need to do this for each row of 'eyes' you load.
Remember to load each row selection on a new layer.
32. The next part you can do either of two ways. You can copy and paste the 'eye' you already made, and resize it for each row, or you can make a new one for each row that you need. Since each shape will be rotated, I chose to do a new one for each row of 'eyes', so that the distortion was minimized. Make the shape about 25-30% smaller for each row as you're going up to the top of the tail. The screen shot below will give you an idea of how to arrange each row. They look better if they're arranged so that they don't line up exactly above each other. Try to put each row above the spaces in the row before it, and put a few outside the tail shape to give it a more natural look. Remember to add a new raster layer for each row of 'eyes'.
These are the angles I used. Yours may be different,
Tired of this yet? Just one more page!
|