This tutorial, such as it is, is my own original work. Please do not upload it to another site and claim it as your own work. If you wish to use it in a group project, please email me first, and provide a link to it here at my site. Thanks!
This image was created in PSP 7 with no outside filters, but I see
no reason why it can't be done in PSP 6. It is assumed that you have
a basic knowledge of PSP, and that you're able to work with very
basic vector shapes. It is lengthy, since I've included a lot of
screen shots, but it's not difficult. I have not included selections,
since we're dealing only with basic shapes.
Supplies needed: Paint Shop Pro 6 or 7...download a fully functional demo here.
Remember to save your work often! It's a good idea to open
your new image,
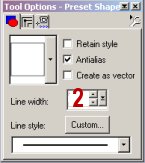
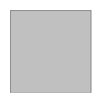
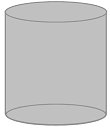
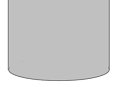
Let's get started. I began and ended my image on one canvas. However, when I did the second one for this tutorial, I did the mouse and the paint can on separate canvases and then combined the two, which is how I will present it here. Feel free to work on one large canvas if you prefer. 1. Open a new transparent image, about 300 x 300. If you're working on a single canvas, you'll likely need to double the size. We'll begin with the paint can. 2. Using your preset shapes tool, set as follows, draw a rectangle at the bottom of your image. The colors I used are #808080 for the stroke, and #C0C0C0 for the fill. If you'd prefer a stroke (outline) that's not as heavy as this, set your line width to one (1) instead of two (2). I made the outlines in this image heavy enough for them to show up clearly in the screen shots.
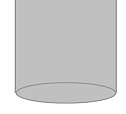
3. Add a new layer. Again using your preset shapes tool, same settings, draw an oval at the bottom of your rectangle about the same width as the rectangle, and move it into place as in the image below. 4. Now go to your layers palette, right click on the oval layer, and click on 'duplicate layer'. 5. Using your mover tool, place the duplicate layer at the top of the rectangle, as shown.
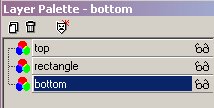
6. Go back to your layers palette, and drag the layer containing the bottom oval beneath the rectangle layer. Your layer palette will now look similar to the image below, depending on how you've named your layers.
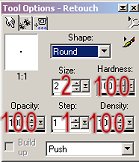
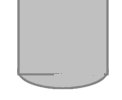
7. Click on your 'rectangle' layer to make it the active layer, and go back to your image. 8. Using your retouch tool (the little hand icon), set as follows, 'push' the lighter color down over the dark line at the bottom of the rectangle to erase it.
9. Go back to your layers palette, and click on the little glasses icon beside your top layer to hide it, then go to 'layers/merge/merge visible' to merge the rectangle and bottom oval layers. 10. Again, in your layers palette, click on the glasses icon
beside your top oval layer, to make it visible again, and click on the
top layer to make it your active layer.
|