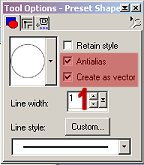
OK, OK...I know you're tired, but I'm the one doing all the darn typing! LOL We're not too far from being done...honest! Don't pay any attention to those fingers crossed behind my back! LOL 42. Add a new raster layer, and call it 'arm down'. 43. With your colors set to the same ones you used for the head, and your preset shapes tool set as below, draw an ellipse for the arm as shown.
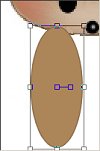
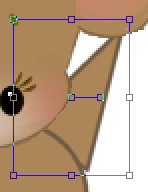
44. Click on your object selector, then right click inside the box around the arm, and scroll down to 'node edit'. Adjust your nodes as in the image below.
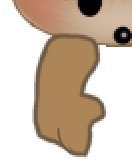
45. Go to your layers palette, right click on your arm layer, and click on 'convert to raster layer'. 46. Use your draw tool set at freehand, size 1, to draw a small line at the middle bottom of the hand, as shown.
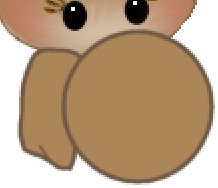
47. Add a new raster layer. Name it 'tummy' or 'body' ...whatever! LOL 48. With your preset shapes tool set as before, except you can UNcheck vectors, draw an ellipse for the body of the mouse, as shown below.
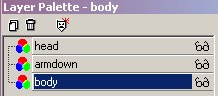
49. Go to your layers palette, and drag the tummy layer to the bottom. Your layer palette should now look like this.
50. Using your selection tool, draw a rectangle selection around the tummy elipse, and click inside the rectangle to select the ellipse. 51. Add a new raster layer. Using your airbrush set as below, and your foreground color set to white, lightly spray some white inside the selection. 52. Go to 'effects/blur/gaussian blur', and blur by 3 to 5. Deselect. 53. Go to your layers palette, and click on the glasses beside the head and arm layers to make them invisible. Merge/visible the body layer and the white layer. 54. Add a new raster layer. Name it arm up. 55. Using your preset shapes tool set as shown, draw a triangle next to the body on the other side. Start at the upper end, away from the body, so that the larger end of the triangle is next to the body.
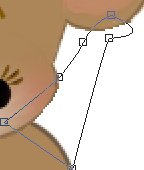
56. Click on your object selector tool, then click inside the box around the arm shape, and scroll down to 'node edit'. 57. Adjust your nodes until they appear similar to the screenshot below.
58. In your layer palette, right click on the armup layer, and click on 'convert to raster layer', then drag this layer to the bottom, under the head and body layers. 59. Add a new raster layer. Name it paintbrush. 60. Choose the colors you want to use for your brush handle...darker for the foreground color (stroke), and lighter for the background color (fill). 61. Now draw a very long, skinny triangle near the arm, as shown below. Start with your cursor at the bottom of the shape you want to draw, so that the wider end is at the top when you're done.
62. Go to 'image/rotate', make sure 'all layers' is UNchecked, and rotate your brush handle about 15-20 degrees right. You'll have to adjust your rotation according to the way your arm and thumb are angled, so if 15 or 20 degrees doesn't work, just undo and try another angle. It should look similar to the one below when rotated correctly.
63. In your layers palette, click on your armup layer to activate it. With your selection tool, draw a rectangle around the arm and click inside the rectangle to select the arm. 64. Now highlight your brush layer to make it the active layer, and hit your delete key. Your image should look similar to the one below, with the thumb now showing on top of the brush.
65. Add a new raster layer, and with your preset shapes tool set as for the arm, draw a small elllipse on the outer side of the brush, as shown.
|