I think I need a course in how to remember things...had to check twice to see where I left off! LOL 11. OK, now that your top oval layer is active, draw a rectangle around it with your selection tool, then click inside the rectangle to select the oval. 12. Add a new raster layer, but do not deselect. 13. Go to 'selections/save to alpha channel', so that you'll be able to use the same selection later. 14. Now go to 'selections/modify/contract', and contract the selection by 8. 15. Choose a new foreground color for the paint you want in
the can and flood fill the selection with that color. Deselect.
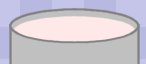
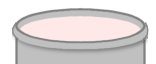
16. Using your mover tool, drag the paint color you just made down to meet the bottom of the top oval, as shown.
17. Add a new raster layer. 18. Go to 'selections/load from alpha channel', and click on
the selection you saved
19. Go to 'selections/modify/expand', and expand by 6.
20. Flood fill this selection with the same color as the main part of your paint can, the light grey in mine. Do not deselect.
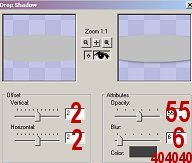
21. Go to 'effects/3D effects/drop shadow', and use the settings below.
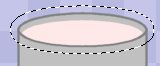
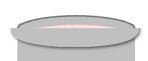
22. Your image should look similar to the one below. Deselect.
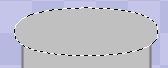
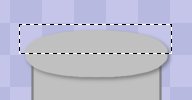
23. Now go to your selection tool, and draw a rectangular selection around the top half of your oval, as in the image below, then hit your 'delete' key.
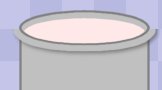
24. Go to your layers palette, and drag this layer below the top oval layer, as below.
25. I usually use the 'push' tool to do the following step, because I feel that I have better control with it, but you can use the eraser tool if you prefer. Now round out the sides of the rim so that it fits the top of the can by erasing some of the extra width. The image below might give you a better idea of what I'm trying to explain, since I didn't do a very good job verbally! LOL Use your draw tool set to freehand line with a width of one (1) to outline the sides with the darker of your two can colors when you're done shaping it.
26. Now you can go to 'layers/merge/merge visible', and you'll
be left with only one layer.
|