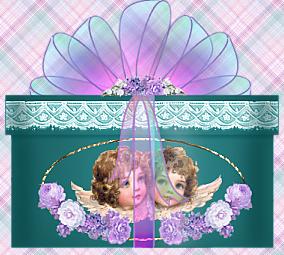
| 1) Open a new image,
500x500 transparent background. I like to work on a large canvas,
but if you prefer smaller, that's fine too.
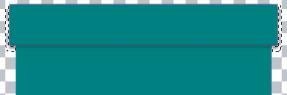
2) Preset shapes tool/ rectangle/ filled/
antialias checked/ create as vector unchecked. Start at coordinates
35/185 and end at 385/240.
3) If you're using the texture I used,
go to texturizer filter/ load texture/ light crystalize/ scaling 100%/
relief 4/ light direction top left.
4) Add a new layer.
5) Using the preset shapes tool with the
same settings as before, draw a rectangle from coordinates 25/185 to 395/240,
and texturize as you did the first one.
6) Using a darker shade of whatever color
you're making your box, add a drop shadow to the smaller rectangle as follows:
Opacity 50%/ blur 6/ Vertical offset 4/ Horizontal offset 0.
7) Merge visible layers.
8) With your magic wand, click on the extraneous
shadow that falls outside the box, then hit delete.
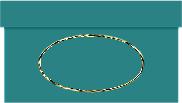
9) Add a new layer, and using the
preset shapes tool, draw a white ellipse in the center of your box bottom.
Modify selection/ contract by 3 and hit delete.
 
10) Click in the white border that's left after
you hit delete, and then add a Blade Pro or other effect that you like.
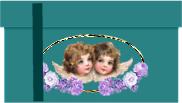
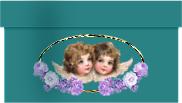
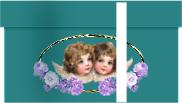
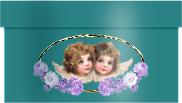
11) Add a new layer, and place a picture that
you like in the center of the oval you just created.
12) Add a new layer, and place flowers or whatever
decoration you choose around the oval.
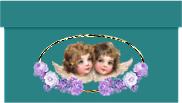
14)Merge visible layers.
13) With your selection tool, draw a rectangular
shape around your box, then click inside it to select the box.
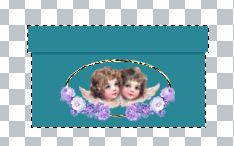
14) Keep selection active, add a new layer, and
change your foreground color to a deeper shade of the box color.
15) Using the line tool/single line/ style stroked/
width 25/ antialias checked/ all others unchecked, draw a straight line
from the top to the bottom of your box, beginning at about 90/185.
Go to Blur/ gaussian blur/ radius 18 and click OK.
16) Keep selection active, and add a new layer.
This time change your foreground color to white, and draw another line
starting at coordinates 250/185 down to the bottom of the box. Again
gaussian blur at radius 18 and click OK.
17) Keep selection active, and merge visible
layers.
18) Add a new layer, and with your foreground
color set to a darker shade of your box color, go to effects/ cutout/ fill
interior with color unchecked/ opacity 75%/ blur 45/ vertical offset 0/
horizontal offset 45.
19) Keep selection active, and add a new layer.
Do another cutout with the same settings, but change the horizontal offset
to about -25 (minus 25).
20) Deselect, merge visible layers. Add
your bow and you're finished!
If you have problems with this, don't hesitate to contact me and I'll do my best to help.
|