| 8. Go back to your lace image, and
then go to 'effects/geometric effects/', click on 'punch',
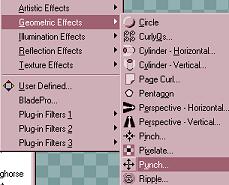
and set the size to about 70, in the screen that pops
up, then click on OK.
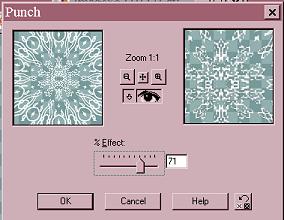
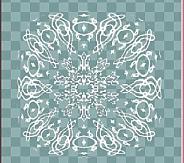
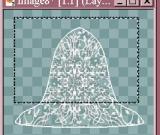
This is what your lace image will look like now...more
rectangular than round. If you have a large lace image that you're
using, one that's wider than the bottom of your bell, then the punch
step may not be necessary.
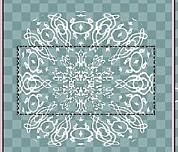
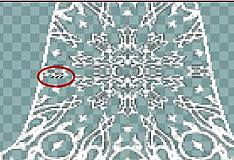
9. Now choose an area of the lace design
that appeals to you, and make a rectangular selection with your selection
tool, as in the image below.
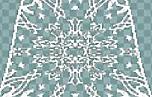
10. Go to 'edit/copy', to copy the selection
you just made.
11. Now go back to your bell image, and make
sure that you still have the interior of the bell selected. Add a
new layer.
12. Go to 'edit/paste/paste into selection',
as you did for the first lace fill. This will fill the bell shape
on the new layer you just created. Deselect.
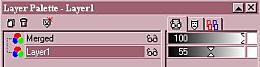
13. Open your layer palette, and drag the new
layer (layer 2) underneath your first layer.
14. Now we want to get rid of the unnecessary
fill on layer 2, so make sure that you have layer 2 highlighted in your
layer palette, which you can drop down by clicking on this icon  ,
if it's not showing on your work area. Using your selection tool,
draw a rectangle around the upper part of the bell, as shown, ,
if it's not showing on your work area. Using your selection tool,
draw a rectangle around the upper part of the bell, as shown,
then hit your delete key, and deselect. Your
image should look something like the one below.
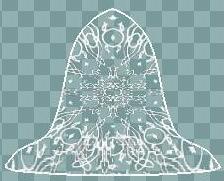
15. As you can see, there are still some parts
of the lace fill on layer 2 that are making the pattern look rather messy,
so with layer 2 still highlighted, carefully erase the parts of the lace
fill that are overlapping the edge of the fill on layer 1. Your image
should look similar to this one.
Hopefully, you'll be able to see the improved clarity
in the lace fill in the above image.
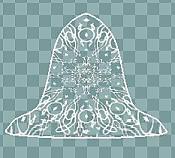
16. Now go to layers/merge/merge visible, and
you'll be left with only one layer.
17. If you zoom in on your image, you'll notice
some discoloration (grey/black marks) in your lace pattern, which are caused
by the resizing of the lace image to fit into the selection. If you've
used a lace image that's larger than your bell, this may not be a problem
with your image. To get rid of these, click on your 'magic wand',
set your tolerance to about 25, and click on one of the dark colors you
want to remove.
Go to 'selections/modify/select similar', and you should
get marching ants around most of the discolored parts. Hit your delete
key, and the discoloration is gone, as in the image below. If you
find that there's been too much of your lace detail deleted, undo this
step and try again, setting your tolerance a little lower before clicking
on the first discoloration.
18. Now open your layer palette, right click
on the merged layer, and then click on 'duplicate'. Do this twice,
and your lace becomes more visible.
19. Layers/merge/merge visible, and then, with your 'magic wand',click in the area outside your bell. Go to 'selections/invert',
and your bell will be selected.
20. Add a new layer, and flood fill your bell selection with white. Open your layer palette, and lower
the opacity on this new layer to about 55, or whatever looks good to you.
NOTE: Depending on the color you want
to use for your background, the opacity you set can look very different,
so this may be a good time to add a new layer under all the other layers
and flood fill it with your background choice to give you an idea of how
your opacity will look at different settings on different colors and/or
textures. You want it to look delicate and almost transparent, so
play with the settings until you get a look you like.
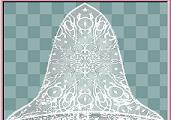
21. Drag layer 1 underneath the merged layer
that contains your bell. If you've added a background color layer,
click on the glasses to hide that layer. Make sure one of the layers
you're merging is highlighted, then go to layers/merge/merge visible.
Your bell should look something like this.
Page
3
|